

Everybody knows by now that the words “friction” and “sales” get along with each other like peanut butter and j…alapeños.
Ok, that one actually took me like 5 min to think of (apparently peanut butter goes well with a lot of foods), but you get the point.
The less friction you have in your sales process, the more moolah you’re going to make.
One of the best ways to reduce friction is to not ask your potential customers for information you already have.
For example, if you’re sending out a direct sales email to your subscriber list, you shouldn’t need them to input their name and email address on the checkout form.
That’s information you already have sitting in your CRM.
So in this tutorial, I’m going to show you how you can automatically prepopulate your WooCommerce checkout fields in CartFlows.
By the way, if you happened to stumble on this page and don’t know what CartFlows is, you should check it out. It’s the best implementation of a funnel builder for WordPress that I have seen to date.
Step 1: Add the following snippet to your theme’s functions.php file.
// Autofill checkout fields from URL

add_filter( 'woocommerce_checkout_fields' , 'prefill_billing_fields' );

function prefill_billing_fields ( $address_fields ) {


   // Get the data from the URL

   if ( isset( $_GET['fname'] ) || isset( $_GET['lname'] ) || isset( $_GET['email'] ) )
   {

   // wp_die();

       $fname = isset( $_GET['fname'] ) ? esc_attr( $_GET['fname'] ) : '';
       $lname = isset( $_GET['lname'] ) ? esc_attr( $_GET['lname'] ) : '';
       $em   = isset( $_GET['email'] ) ? esc_attr( $_GET['email'] ) : '';

       // First Name

      if( isset($_GET['fname']) && ! empty($_GET['fname']) ){
         if( isset( $address_fields['billing']['billing_first_name'] ) ){
             $address_fields['billing']['billing_first_name']['default'] = $fname;
         }
      }

      // Last Name

      if( isset($_GET['lname']) && ! empty($_GET['lname']) ){
          if( isset( $address_fields['billing']['billing_last_name'] ) ){
             $address_fields['billing']['billing_last_name']['default'] = $lname;
          }
      }

      // Email

      if( isset($_GET['email']) && ! empty($_GET['email']) ){
          if(isset( $address_fields['billing']['billing_email'] )){
             $address_fields['billing']['billing_email']['default'] = $em;
          }
      }
   }

   return $address_fields;
}
This snippet will allow you to automatically set the user’s first name, last name, and email address.
Step 2: Establish your URL.
In order to prefill the checkout fields, we need to specify what we want the actual values to be.
We can do that quite easily using URL queries.
Based on the snippet above, we need a URL that looks like:
https://www.yoursite.com/checkout-page/[email protected]&fname=John&lname=Smith
Once someone follows through that link, the checkout form will automatically pull the email address of [email protected], their first name John, and last name Smith.
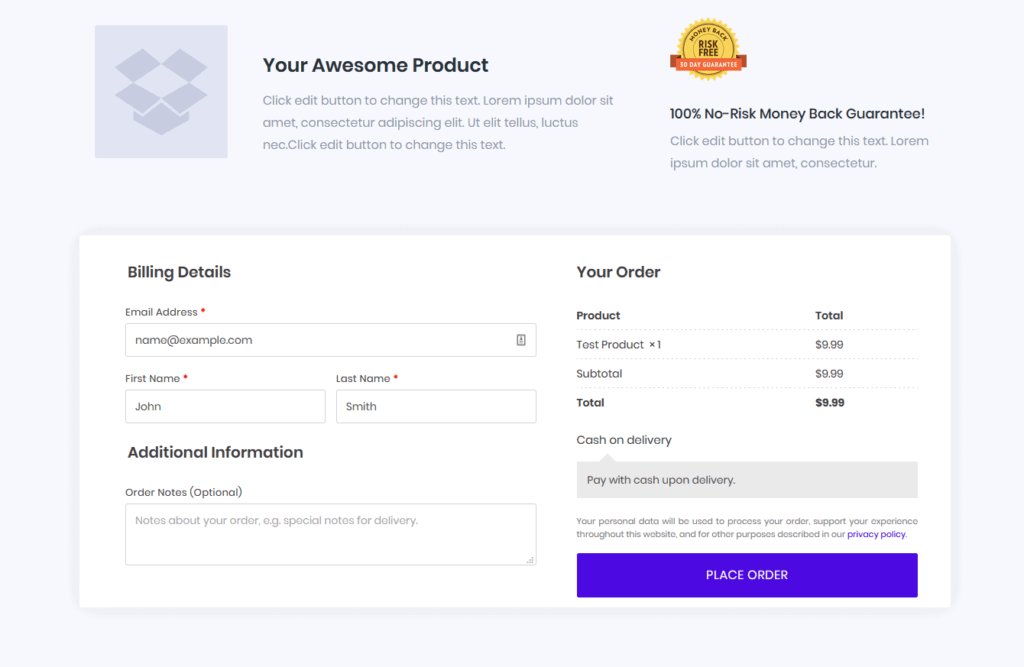
That way, all they need to do is click “Place Order.”
Easy.
Step 3: Build a personalized URL in your tool of choice.
Up until this point, we’ve been able to specify a value that we want to use to prepopulate the field. Great.
But how do you accomplish this at scale – for all your contacts?
You need to build a personalized URL in whatever tool you’re using to send traffic to the checkout page.
For example, if you’re using ActiveCampaign (or any other email autoresponder), you can set your button’s URL to look like:
https://www.yoursite.com/checkout-page/?email=%EMAIL%&fname=%FIRSTNAME%&lname=%LASTNAME%
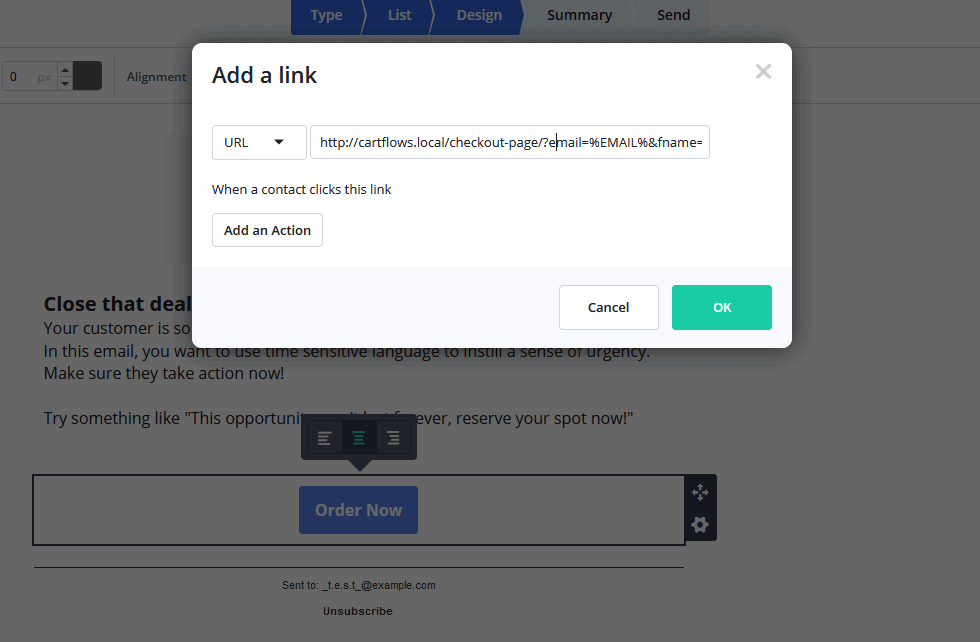
That way ActiveCampaign will automatically pull the subscriber’s info, and insert it into the URL.
If you’re using Elementor Pro‘s forms, you can use Actions After Submit > Redirect, and set the redirect link to something like:
https://www.yoursite.com/checkout-page/?email=[field id=”email”]&fname= [field id=”firstname”]&lname=[field id=”lastname”]
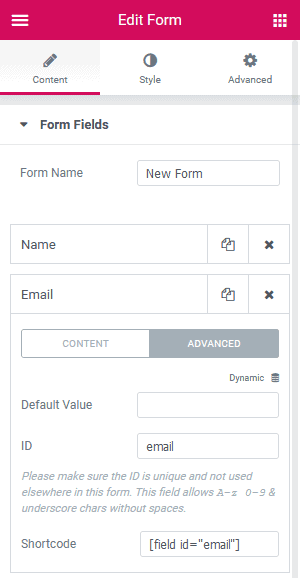
You’ll need the field id to match whatever you’re using in your form. You can find the ID for a field by clicking on the Advanced tab.
This process will of course will vary depending on what tool you’re using.
If you’re able to send users to a personalized URL though, then you’ll able to prefill their checkout fields without an issue.
BONUS – How to Prepopulate More Than Just Their First Name, Last Name, and Email
If you want to prefill other fields as well – like their Company Name – that can be done with a slight tweak to the snippet above.
All you really need to do is replicate and replace with your new field. Here’s what the snippet would look like with the Company Name field included:
// Autofill checkout fields from URL

add_filter( 'woocommerce_checkout_fields' , 'prefill_billing_fields' );

function prefill_billing_fields ( $address_fields ) {


   // Get the data from the URL

   if ( isset( $_GET['fname'] ) || isset( $_GET['lname'] ) || isset( $_GET['email'] ) || isset( $_GET['company'] ) )
   {

   // wp_die();

       $fname = isset( $_GET['fname'] ) ? esc_attr( $_GET['fname'] ) : '';
       $lname = isset( $_GET['lname'] ) ? esc_attr( $_GET['lname'] ) : '';
       $em   = isset( $_GET['email'] ) ? esc_attr( $_GET['email'] ) : '';
	   $company   = isset( $_GET['company'] ) ? esc_attr( $_GET['company'] ) : '';

       // First Name

      if( isset($_GET['fname']) && ! empty($_GET['fname']) ){
         if( isset( $address_fields['billing']['billing_first_name'] ) ){
             $address_fields['billing']['billing_first_name']['default'] = $fname;
         }
      }

      // Last Name

      if( isset($_GET['lname']) && ! empty($_GET['lname']) ){
          if( isset( $address_fields['billing']['billing_last_name'] ) ){
             $address_fields['billing']['billing_last_name']['default'] = $lname;
          }
      }

      // Email

      if( isset($_GET['email']) && ! empty($_GET['email']) ){
          if(isset( $address_fields['billing']['billing_email'] )){
             $address_fields['billing']['billing_email']['default'] = $em;
          }
      }

	   // Company

      if( isset($_GET['company']) && ! empty($_GET['company']) ){
          if(isset( $address_fields['billing']['billing_company'] )){
             $address_fields['billing']['billing_company']['default'] = $company;
          }
      }
   }

   return $address_fields;
}
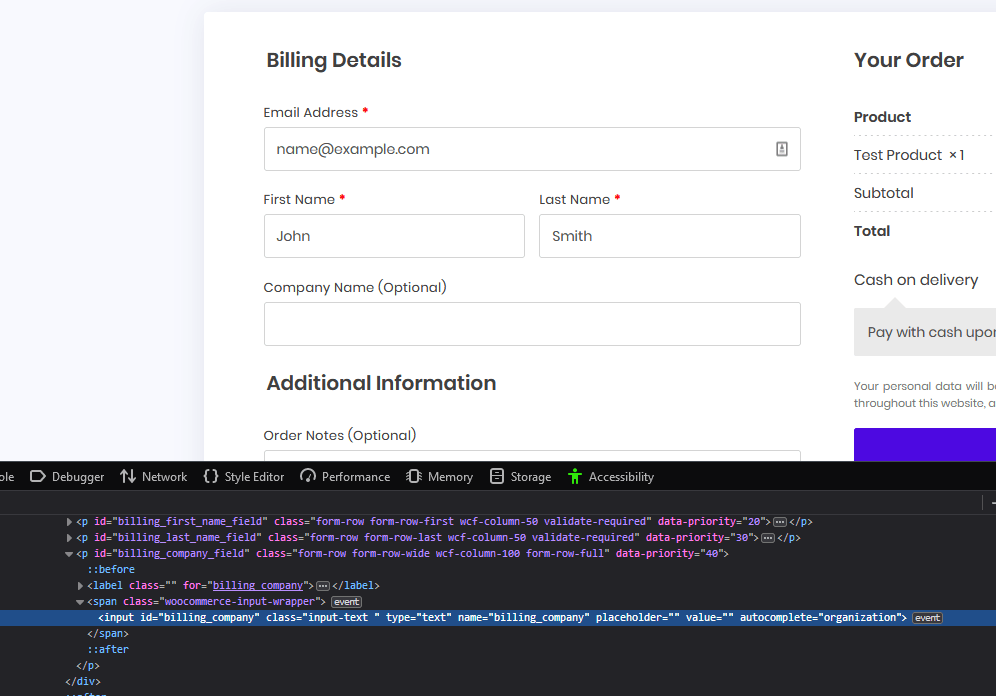
The only trick part is that you need to know the name of the WooCommerce field. In this case, it’s billing_company.
You can usually find these field names by right clicking > inspecting the fields on your form.
Then the structure of your URL would look like:
https://www.yoursite.com/checkout-page/[email protected]&fname=John&lname=Smith&company=ABC Company
That’s all there is to it!
If you found this tutorial helpful, be sure to give it a rating below so that I know to make more content like this in the future.
I’ll also be posting more CartFlows related tutorials over on the YouTube channel. It would mean the world to me if you had a second to subscribe.
Thanks for reading!